Because you haven't to be a video technician
to obtain good results…

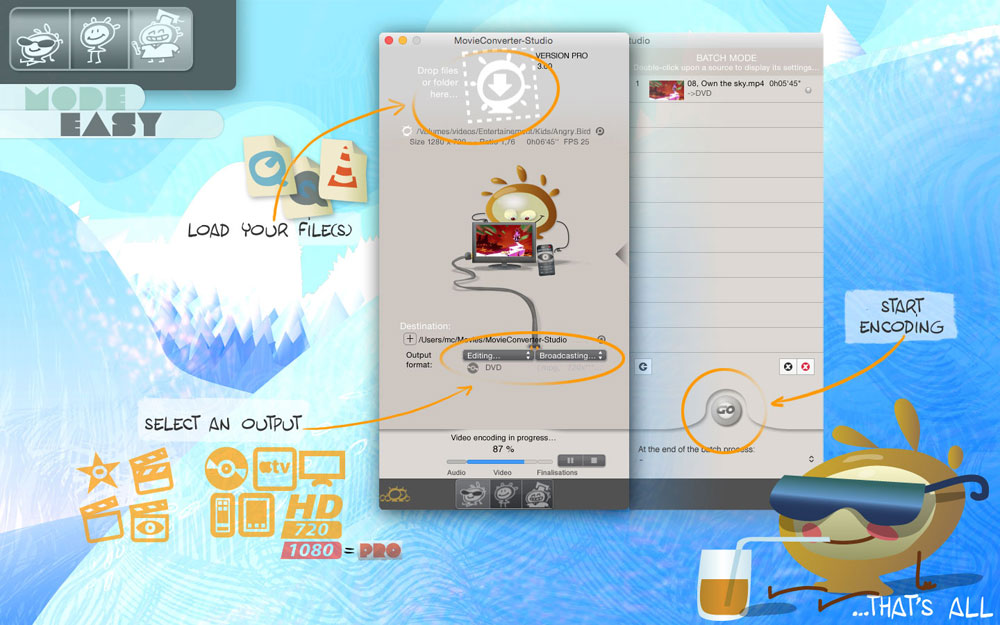


How to use
 and French
 .The others languages
 Main features:

Standard
Exclusive Feature: Adaptation to your Television Standard (videos will be conformed …but without jerking).

Aspect
Your movies will no more be deformed after encoding.
Exclusive Feature: …even though your videos need a more complex display (automatic detection and management of anamorphic files).

Aspect:
Exclusive Feature: Ability to turn your videos from "square screen" to "wide screen" (and vice versa).

Broadcasting
To convert your videos for all your devices: from your Android mobile to your new connected HD television!

Editing
To convert your video for Professional editing in FCPX (or in older versions of Final Cut Pro).

Editing
To convert your videos for editing in iMovie (for every versions).

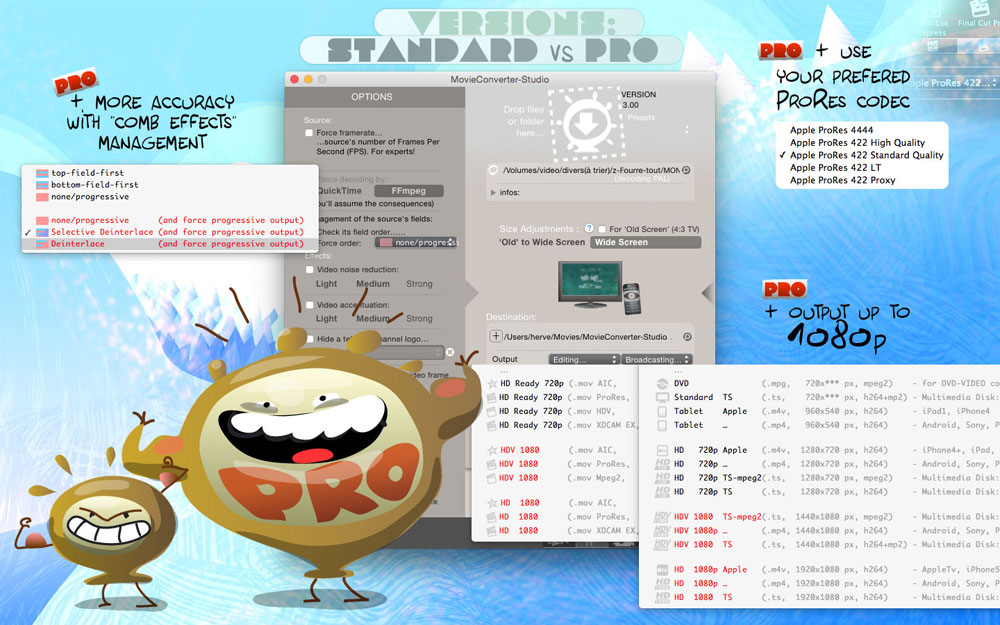
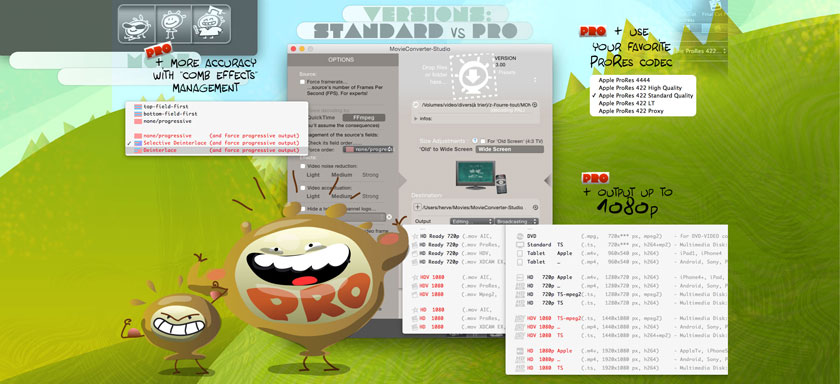
Interlacing
Exclusive Feature: you never encounter "comb effects" during playback, and without degrading quality like others softs do (Automatic management, according to the device used to play the video).

Formats
Handle most of the main Media Formats (codecs and containers), like: MPEG4, H264, Matroska, PRORES, DNxHD, DV-Video, MPEG TS, MPEG PS, FLV, AVI, VP8, VP9 (.webm), VOB, MXF, GFX and many more…

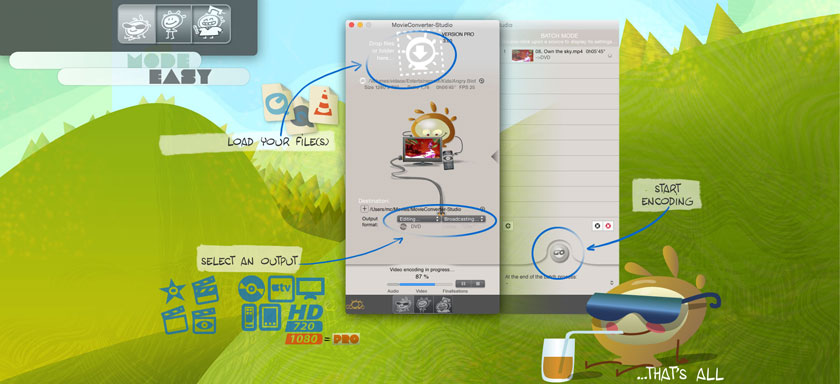
Easy Mode / beginners
video is very technical domain, but your don't have to be an expert about video or specifications, to obtain a good result…
Exclusive Feature: The Easy Mode do not damage the quality of your videos (automations are set to take over your worries).

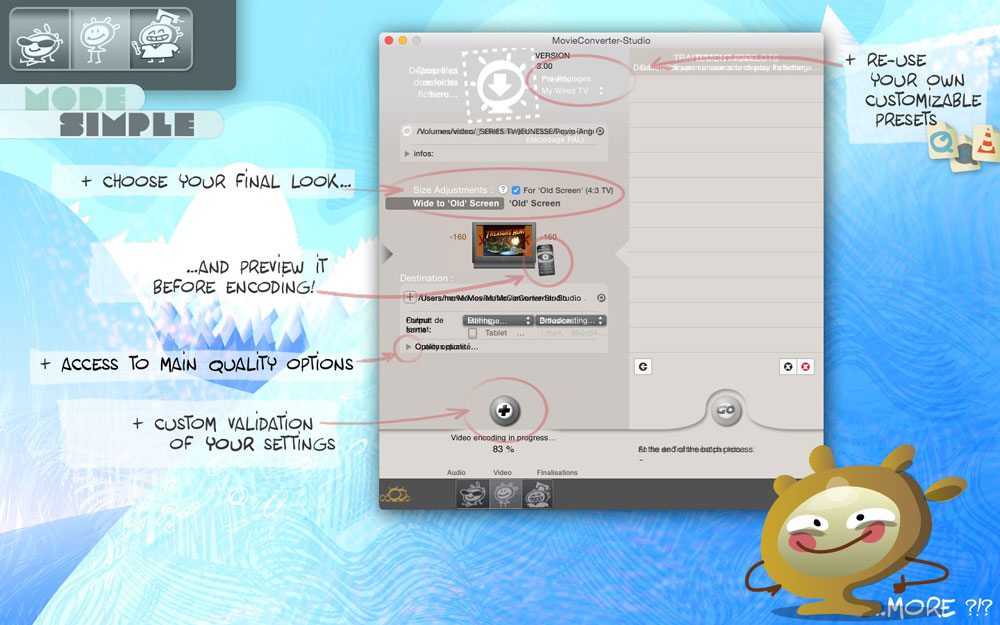
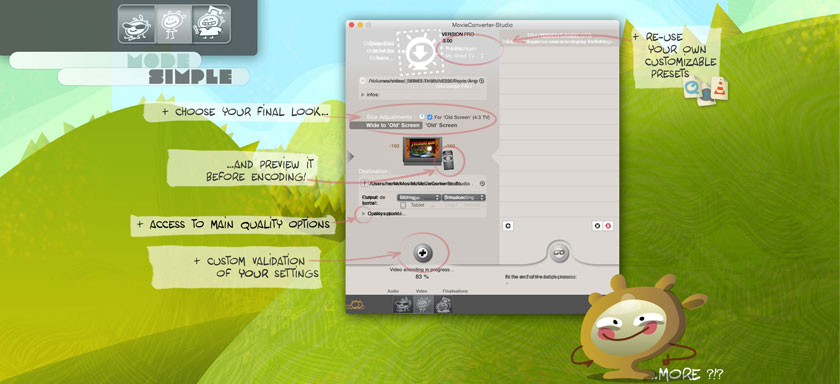
"Professional" really means something here (it's usually used as a bogus commercial argument for beginners, and only means the add of some non-understandable features only for geeks).
MovieConverter integrates some helpful and easily usable pro features:
• To visually check your "comb effects" and their readout order.
• To correct the framerate of a buggy converted video.
• To correct audio loudness, according to the professional broadcasting TV channels need…

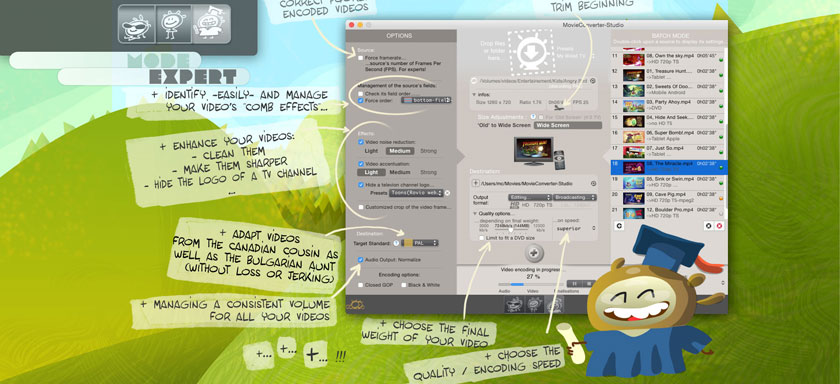
Expert
Do it more!
• Clean your videos.
• Making videos from internet less blurry.
• Remove the logo of a TV channel.
• (To reserve to experts:) MovieConverter has many automations which ensure your quality conversion… But you can override or change them too.

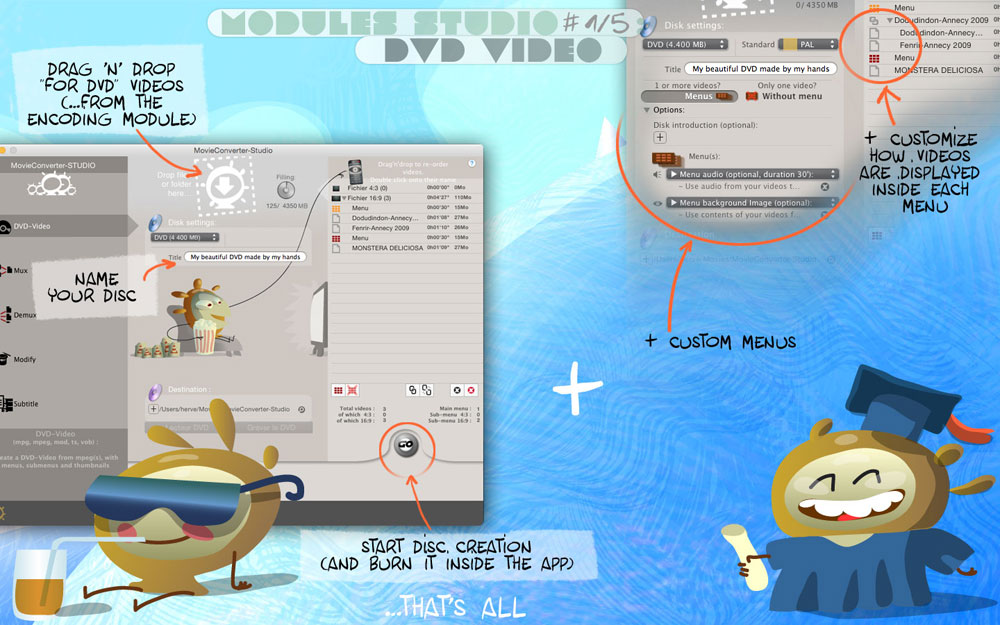
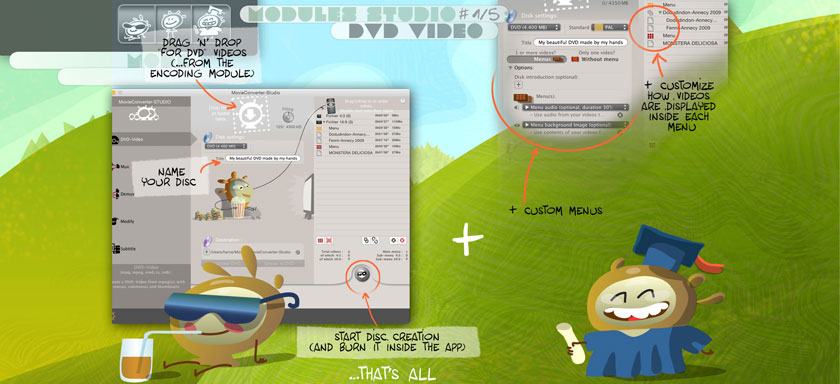
DVD-VIDEO disc
Make your settings in less than three minutes and get a chapterized DVD, with menus in full-screen and animated buttons (and burn it directly from the app).
Readable onto a home DVD Player connected to every television (Exclusive Feature: onto Granny's one and her old square TV, or onto Uncle's big HD TV).
Other Features:
- Preview result (before starting the encoding ;-))
- Some Presets (some are provided but you can easily create your own).
- Batch processing.
- Trim the beginning of the video (…to remove unwanted pre-programs).
- Choose your bitrate (the quality/disk weight ratio of your converted file).
- Ability to automatically limit the bitrate (so, your final video fits well on a disk ;-)).
- Several presets "quality/disk weight ratio".
- Ability to encode in black & white.
- And 4 additional mini-applications to edit your videos "to DVD". The "Studio" modules:
- Multiplex
- Demux
- Subtitle
- Modify the aspect without re-encoding
So, chose your flavor: "easy", "simple" or "expert". MovieConverter-Studio, expert's functions "For Dummies™".
.